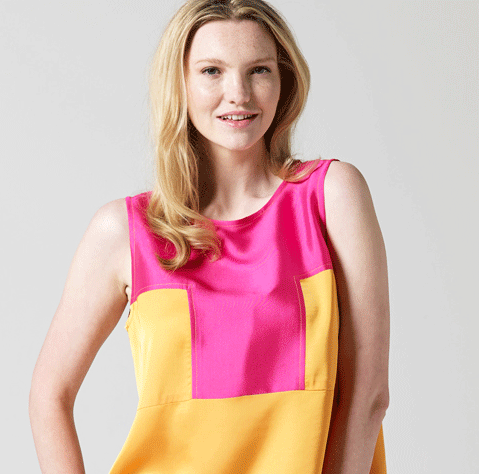
This blog post is to show you how to sew the 'Mena' Pattern from start to finish.
There is nothing more than the love I have for amazing fabrics. I love the way they feel and the different techniques that can be applied to creating them. I have always been fascinated by fabrics... its just my thing. I have said before that I am a fabric hauteur, and I am not ashamed of it.
The Mena pattern was designed, starting with the fabric. I cam across this beautiful brocade fabric which reminded me of a traditional Japanese Kimono. Of course it was a must buy to add to my collection. I then drafted the kimono pattern seeking inspiration from traditional kimonos and modern day jackets. I wanted it to be easy, timeless and effortless to create; a pattern for everyone.
This pattern is very versatile and can be made in a ray of different fabrics. Depending on the time of year or the occasion you are attending you can make and create multiple kimonos to suit.
I created my kimono on a brocade fabric which is a heavy-weight fabric, giving my silhouette a more structured look. If you created this pattern in a rayon/silk/polyester/cotton/linen the drape will be different and it will have a more fluid aesthetic.
This pattern is to get your own inspiration and creative side flowing. It can be embellished to suit your own style and personality. Who doesn't love a little bit of sparkle! (well I love it)
MENA
THE KIMONO JACKET
For my Kimono I chose to create it in an amazing brocade, with contrasting metallic silver binding. I used the edge of the fabrics for an extra trimming.


* All of the PDF sewing patterns are suitable for both US letter and A4 paper. Perfect for all sewers to sew anywhere in the world. I am trying to make sewing fun and convientant for everyone. This pattern also comes with a A0 file for professional printing.
FABRIC
You can use either a heavy-weight or a light-wright fabric. I recommend using woven for stability. The fabric needs to be no shorter than 150cm in width to fit this pattern. If you choose to use a printed fabric, take note. Some printed fabric can come in a one way print, which is what I have used. This means the pattern will need to lay in one direction.
I suggest using a rayon/silk/cotton/linen/polyester/brocade, you can use a blend as well. Head out to your favourite fabric shop and pick out your favourite fabric. Being a simple garment, you can use amazing printed fabric.
TRIMMING
In this pattern you will need binding to sew on the raw edges. This pattern does not have any lining.
I have used contrast binding to create a feature of it. But you can use a binding to match. I bought my binding from my local fabric store already to go. This is much easier as binding is cut on the bias and can take a long time to create yourself.
EQUIPMENT
To print your PDF Pattern
Printer, Paper Scissors, Sticky Tape, Coloured Marker (optional)
To sew this PDF Pattern
Sewing Machine, Zipper Foot, Fabric Scissors, Pins, Measuring Tape, Thread cutters (optional), Iron
TIME TO SEW
STEP 1. Assemble your PDF Pattern, printing your first page and measuring the test square.

STEP 2. Cut out your PDF pattern around the dark line and tape together, following the guides.

STEP 3. Lay out your pattern pieces onto your choice of fabric. Make sure to read your cutting instructions as there is fold lines. Take note if your fabric has a one way print. Measure your straight grain before pinning and cutting out your pattern pieces.


STEP 4. Cut out your pattern pieces.

STEP 5. Prepare your binding. Iron your binding in half.

STEP 6. Once you have finished ironing the binding, pin, sandwiching the fabric in between the shoulder and side seams. Leave a little bit over hanging.
STEP 7. You can use contrast thread or matching thread. make sure that your stitching length is on the right tension. Test on a scrap piece of fabric before your start sewing.
Using a zipper foot this allows you to get right up close to the edge of the binding edge. Place your foot as close as you can to the binding edge. Place your foot as close as you can to the edge of your binding. Take your time sewing, as you need to catch the binding on the other side as well. Remove the pins as you go.


Step 8. Once binding is complete you now sew your back piece to your front pattern pieces.
Pin pattern pieces together right sides together. Line your shoulders up and side seams and pin in place.


STEP 9. Sew your shoulder and side seams together using a seam allowance of 1.5cm / 5'8th of an inch. Back tack at the start and at the end of each stitching line.

STEP 10. Cut all loose threads.
Iron your cuffs in half length ways. Pin them in half the other way, right sides together ready for you to sew. Sew a seam allowance of 1.5cm / 5'8th of an inch. Remove the pins as you sew. Back tack at the start and at them end of each stitching line.

STEP 11. Iron open all seam allowances. Your cuff, shoulder seams and side seams.

STEP 12. Attach your cuff to your sleeve. Put your Cuff inside the sleeve lining up your seam on the cuff and your side seams together. Sew them together using a seam allowance of 1.5cm / 5'8th of an inch.

STEP 13. Attach binding to your sleeve and cuff seam allowance hiding the raw edge. Take your time pinning and then sewing it in place. Again place your zipper foot right up close to the edge of the binding. Sew slowly catching the binding on the other side as well.

STEP 14. Make sure that your seams are lined up. Iron your cuffs. Iron your seam allowance towards the body of your kimono.
. 

STEP 15. You can use contrast binding or the same colour to finish the edge of your collar and your hem line.
Attach your binding to your collar first and them sew that in place.
Attach your binding to your hem line leaving a little over hand on either end at least 2cm. Like the collar sew that in place.

STEP 16. The hem line is optional to turn up. You can leave it down and expose the binding or hand sew it up.
If you are leaving it down to expose the binding fold the binding on each end in twice and hand sew in place.
If you are turning your hem up, fold the left over binding in and hand sew your hem in place. I like to use matching thread to camouflage.
STEP 17. You have finished. Give your garment a final press and cut all loose threads.
WATCH & LEARN
Keeping sewing simple, I have also created a tutorial showing you how to sew the 'MENA' pattern from start to finish. Watch and follow along, share with your sewing friends and leave me a comment to tell me what you think.
Enjoy and have fun making this pattern! I want to see your creations and the beautiful fabrics you choose to make it in. Share and ask questions on TMF facebook group.
xx Georgina

